Part 1: My Work and Planning
|
This project started out when my partner and I were making tea in her room after school. We were talking about Li Hongbo's paper sculptures. They are solid volumes but can be opened up to show all these little slices inside. His technique for creating the honeycomb connections is ridiculously meticulous and detailed but we wondered if we could show mathematical volumes in a fun way.
|
Li Hongbo's paper sculptures
|
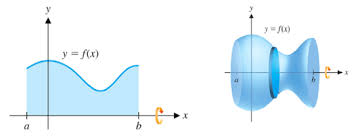
Rotational volumes
|
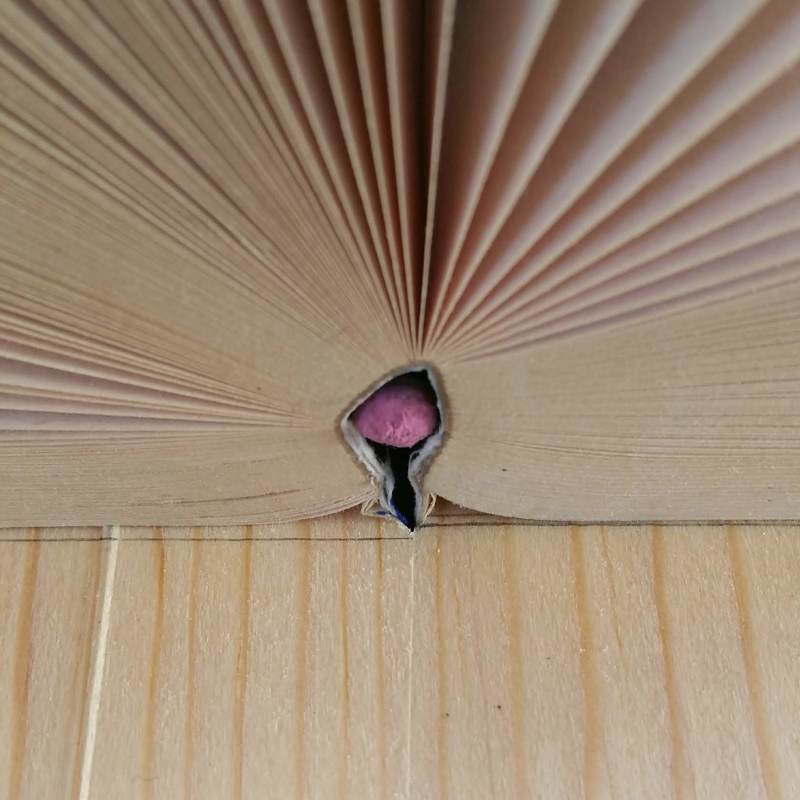
We thought about some kind of lantern to show rotational volumes. We thought that if we could fill in the space inside the volume we could model what a rotational volume is. Inspired by Hongbo, we decided to try and spread open books.
|

My first try. I made a line in Illustrator and cut it on our CNC machine. This was overkill and the machine tore up the edges of the book in the final few passes
On the next try I had my partner make a line for me in Desmos that would be easier to integrate. I then transferred it to the book and cut it out.
|

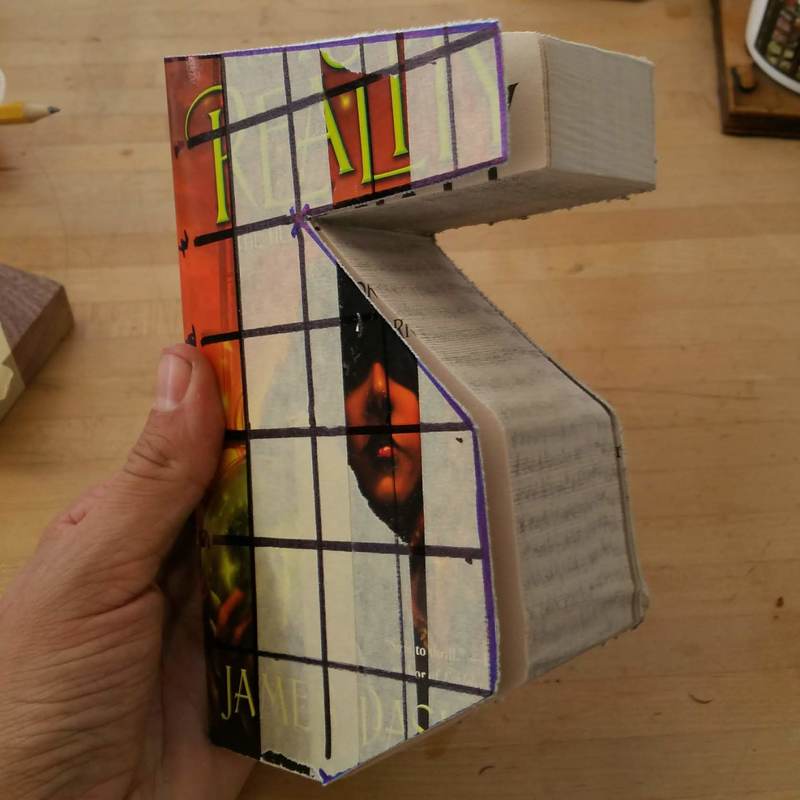
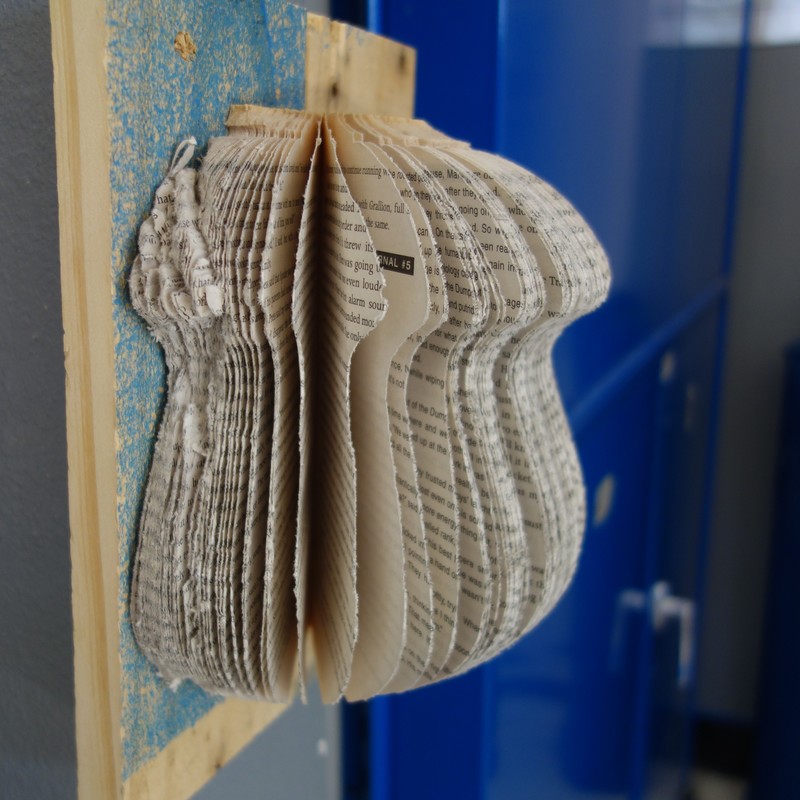
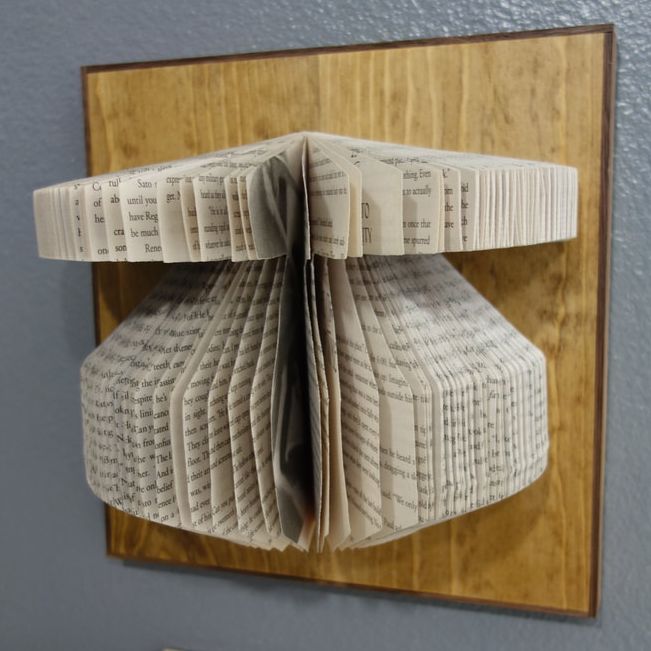
For the second try I just drew a line on the cover of the book and cut it on our bandsaw. The cut quality is way better but when I showed my math partner they said this line would be difficult to describe and solve.
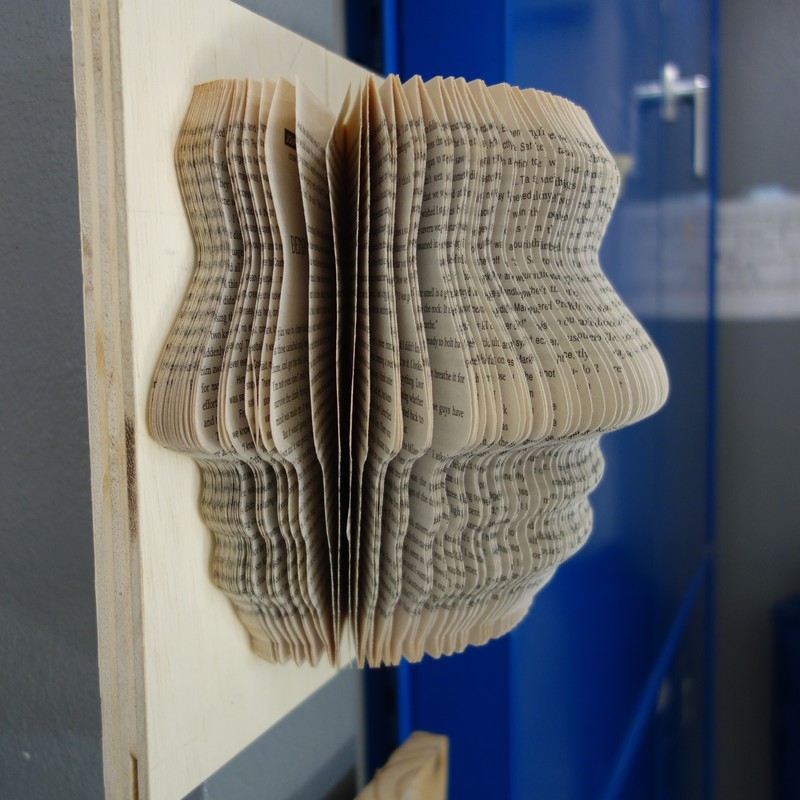
To get the book to stay spread open I secured the front and back covers behind a mounting board. The pencil is there to keep the spine from simply folding in half.
|
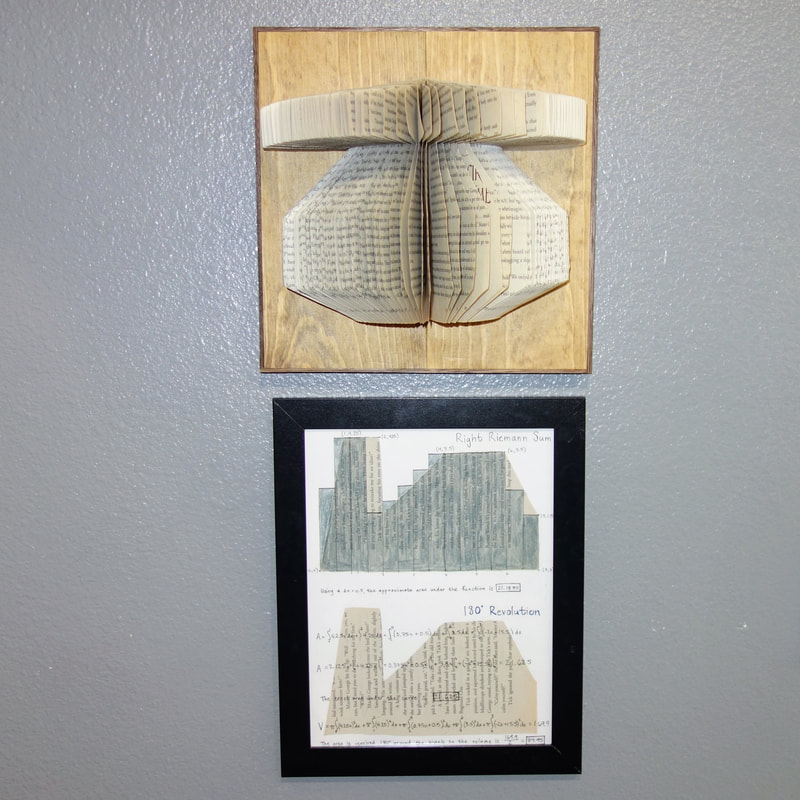
My Final Exemplar
|
Things I learned by doing the project first:
- Make a cut out book first without any lines or math just to get an idea of what looks cool. Then go make a mathematical line that can be integrated. - Use paperback novels of >400 pgs. Don't try glueing thinner books together. - The first thing people do when they see this is touch it and ruffle the pages so you need to bolt it into the wall so it wont fall. Your design must leave space to hide screws underneath. - It's required to add a backing to the piece so that the book stays in place, which adds to the thickness of the mount, so a frame or edge banding is required. It looks dumb if the plywood backing is showing. - The back mount should be 26cm square |
|
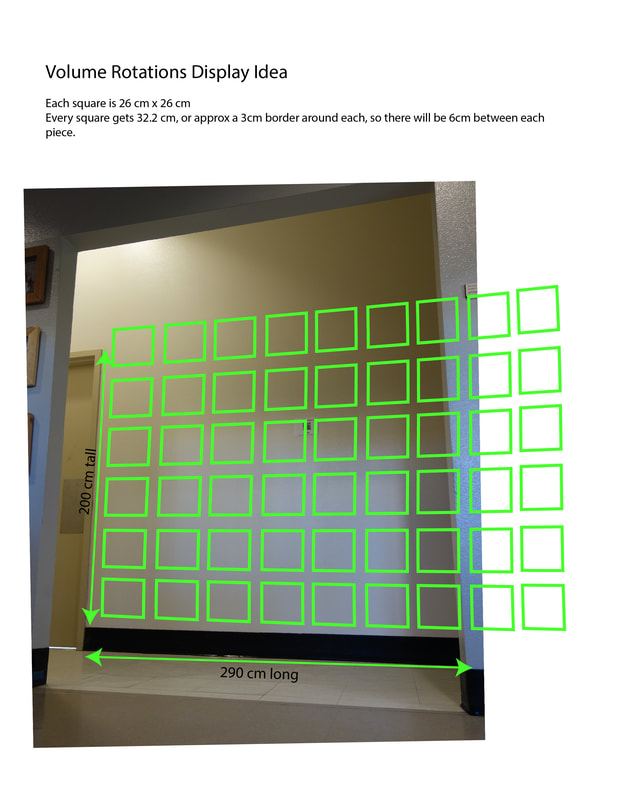
This isn't even my final form...The next step in this project is to to display these in this little nook we have leading to the bathrooms. If every student makes one then we should fill up the space.
This is an example of the project being shaped by the exhibition. I've always thought that this could be a cool space to show work in, and set my project up to take advantage of that. |
|
Deliverables in Order
Cut a book to an interesting shape
Day 1 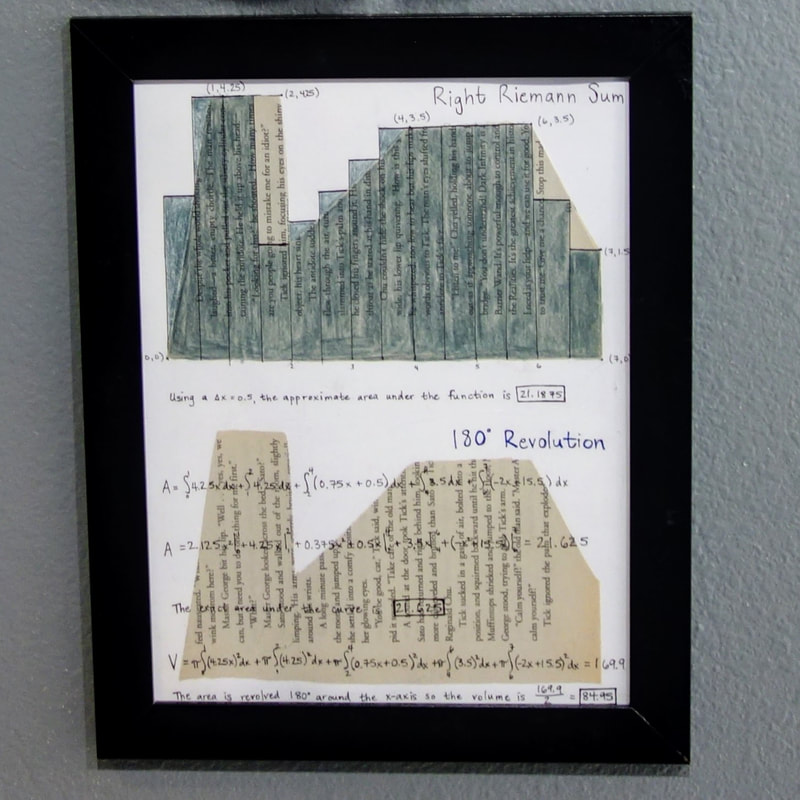
Math view and calculations (in math class) Days 6 -10
|
Make a second cut into a new book, mount it to some junky wood. Day 2 - 4
Final Product. Days 6 - 10
|
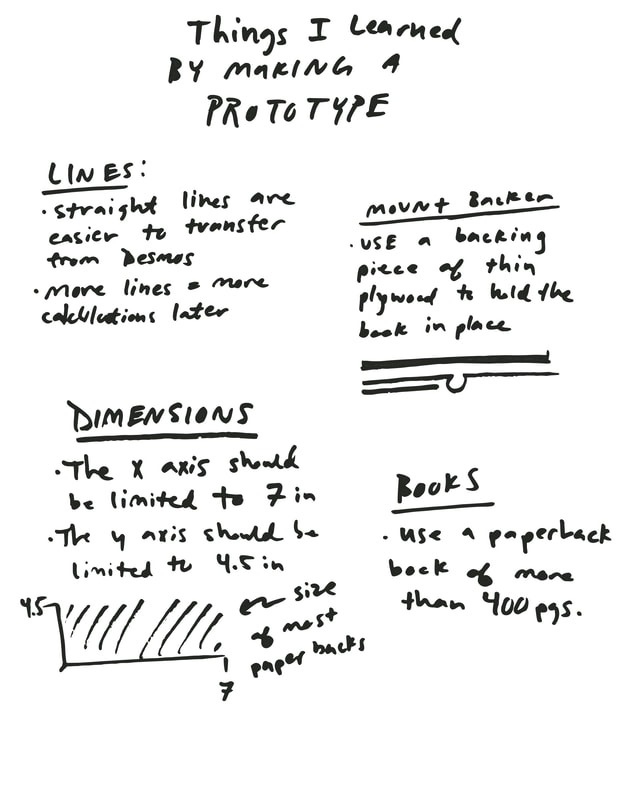
Things I Learned by making a prototype
Mounted. Day 11
|
Part 2: Distribute
Expectations: Clear, Communicated, Realistic
Clear
To be as clear as possible I make a master document to hand out at the beginning of the project. As I get better at this I am learning what does and doesn't need to be included in these. It seems like one should include (at a minimum) a list of the deliverables, a calendar, and assessment methods (grading). It's like a mini syllabus for each project. Not only is it nice for the class to have this for reference, it helps make sure that I'm actually planning this out to a reasonable degree. It's also great to have a few of these on hand in case visitors or families come and ask about the project.
CommunicatedThe best way to describe to someone what you want them to make is to show them an example and all the work that went into it. This is why I always have examples of the finished product ready to show the class before they start. Sometimes I even have examples of each stage in the process to show them as well. I include all my notes and sketches from my project as well so that everyone can see the detail required.
To supplement and display the examples I affix them to the whiteboard and draw notes all around them. This makes the whiteboard become a living document as I answer questions and provide clarity. It also nice because students cannot misplace this in their backpacks. |
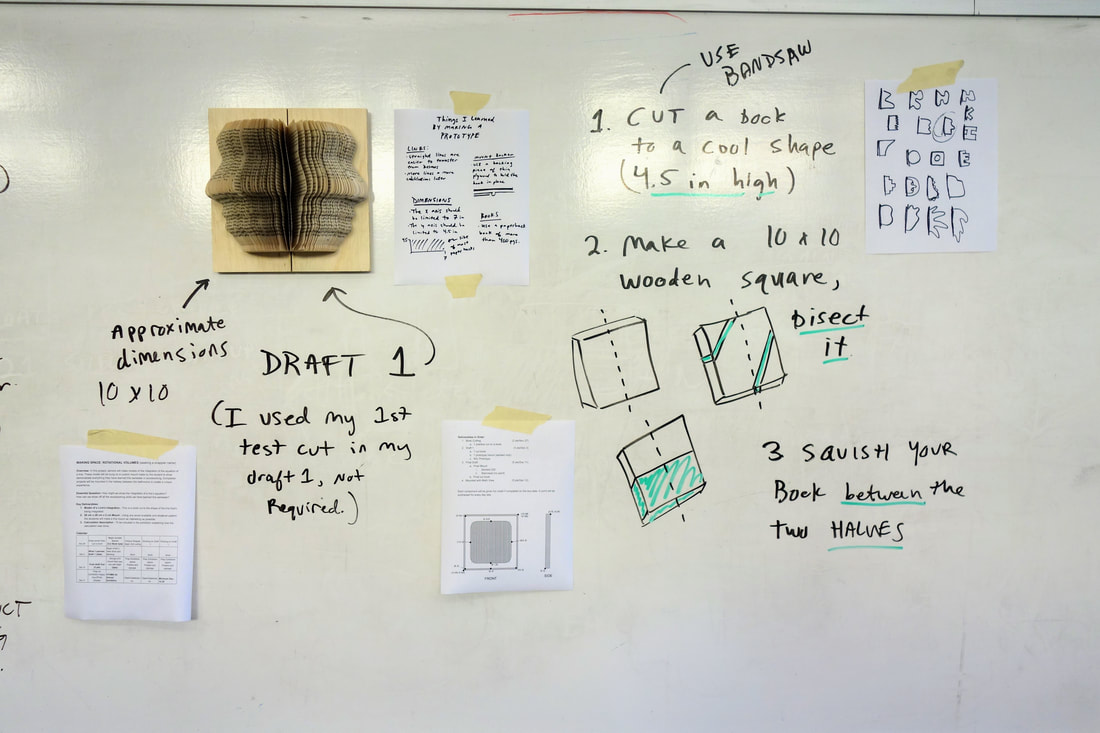
My board at the start of this new project. Examples and copies of the handouts are posted
|
Realistic
|
I know that what I am asking the class to do is reasonable because I have done the exact same thing myself. I am pretty sure that I'm giving them enough time too because I know how long it took me. I've even started providing a suggested timeline that the students follow so that they know they are on track to finish. Below is the calendar that I give to the class on day one.
I also know that I've got the right materials because I've done the work myself already. I went out and got a bunch of books beforehand and learned that they need to be paperbacks and should be over so many pages. This is the kind of thing that sucks to figure out day of and really slows down a project. |
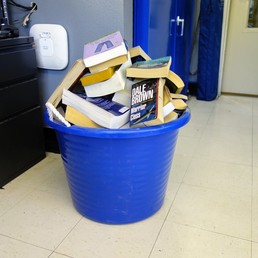
I discovered what types of books work the best by doing the project first.
|
Part 3: Make
Week 1: Cut a Book, Mount It
For the first week of this project I led the class through the same process that I had gone through. So they cut a book to a random shape and then tried to mount it to a book. We were only concerned with the structure of these and making something interesting. Because I had done the project myself I knew that this was a logical scaffolding for how the project works. Since it's so abstract it was important that everyone was able to try first and understand what we were doing.
|
What worked?
I was really happy to have all my models and examples ready to show the class. Some kids finished their cuts really fast and were ready to move on to the next thing, so I just gave them the next piece and let them loose. What was surprising? The variety of shapes that groups made was really exciting. I like to start the project with no limits and then introduce the constraints for subsequent drafts. This is an easier way to build excitement and reduce the amount of front loading required. What will you never do again? I was so excited to share everything about this project that I started rambling on about different deliverables when I should have just given the group the master document and shut up. The time will come for exposition and requirements, but for now I want to just launch the project and build excitement. I will never start a project with anything other than examples and doing. Students will ask their own questions and as long as I have examples and a calendar, I should be able to answer them. Specific to this project, I was surprised to get representational pieces (a tree, a star, etc). I think that non-representational work looks much more interesting and is more reflective of the students thinking. In future projects I need to specify that constraint. |
This is a short video summary of the first week of the project
|
Week 2: Make a better cut, and a better mount
This week is about trying again with more precision. After reflecting on what worked and what didn't work the first time around, everyone got working on their second draft. They refined their book designs in math class and made high quality backers in my class.
|
|
What worked?
The final display looks great. I had to be creative in helping everyone mount their project in straight lines but it really paid off. Having the work displayed very carefully is worth it. This is the first time that I have done a project with the final exhibition location in mind from the start. This makes a huge difference because I was able to optimize parts of the project for the space. The size and shape of the mounts was determined by the location, so they really are custom made for the space. What was surprising? This project felt like it took too long, but 29 of 44 students finished on or 1 day after the deadline. This is really close to my 75% goal where at least 75% are finished on time. I decided to give credit on this project based only on when it was completed, giving full credit on the due date and penalties for each day late. This seems to have resulted in a fair sense of work ethic in the class and most of the group pushed to finish on time. What will you never do again? I split up the grading into lots of small deliverables that I would give credit for finishing. This was supposed to make sure that no body fell too far behind. I almost want to break it up further, but I kept track of all these bits of small credit by pen and paper on a spreadsheet that I printed out. I didn't realize how much time I would spend tracking kids down to ask if they had finished this little piece of the project everyday. I kept stressing out that I missed someone and was marking them Late by mistake. I need to figure out the right way to track small deliverables or give the responsibility to the class so that I don't go crazy. |
Student Feedback:
Reflection on Feedback:
I'm really happy to hear all the stuff that the students learned, especially higher level math content. This seems to show the value of a collaborative project like this. Undertaking a project that requires knowledge from both teachers was very rewarding. I also see in the feedback that many students mention that everything felt planned or that they can't think of something I could have done to help them learn more.
Many students mention wanting more time to finish this project and I think that I will always hear that. I measure how well I scheduled the project based on how many people finish it on time. In this project 65% of the class had finished the project on time or one day late. That's just under my 75% guideline and because so many students mentioned wanting more time for additional drafts, I have to agree. Obviously more drafts will improve a project's quality but I should have given the class explicit room for an additional draft.
I also got comments about making the constraints clear from the beginning. I think I know what happened here. I remember standing in front of the class and setting up the project. This was when I started getting into way too much detail about the specifics of the measurements and the deadlines. I remembered some advice I had gotten a few years ago, "start with experience". In the middle of my outline I stopped and switched to just starting the class off in building. What I should have done is return to the detailed outline the next day. Its funny that as hard as I tried to communicate everything about the project, some students still felt like they were unsure of what they needed to do. In the above "Deliverables in Order" section I notice that I made one unstructured cut out book on the first day and then a second one on the next day. I didn't have the class do that and I can't remember why. In the future I need to scaffold the project more closely to the experience that I had when designing.