|
Lakeview - Wavelike
For this project, students made machines which generate a wave like motion. Everyone had to learn about motors, gear ratios, electricity, woodworking, tension and compression, and more. Each project uses the same motor at the same speed, but students modified the gear ratios of their projects to produce waves and different frequencies according to what they thought would be interesting. |
|
Pre Work:
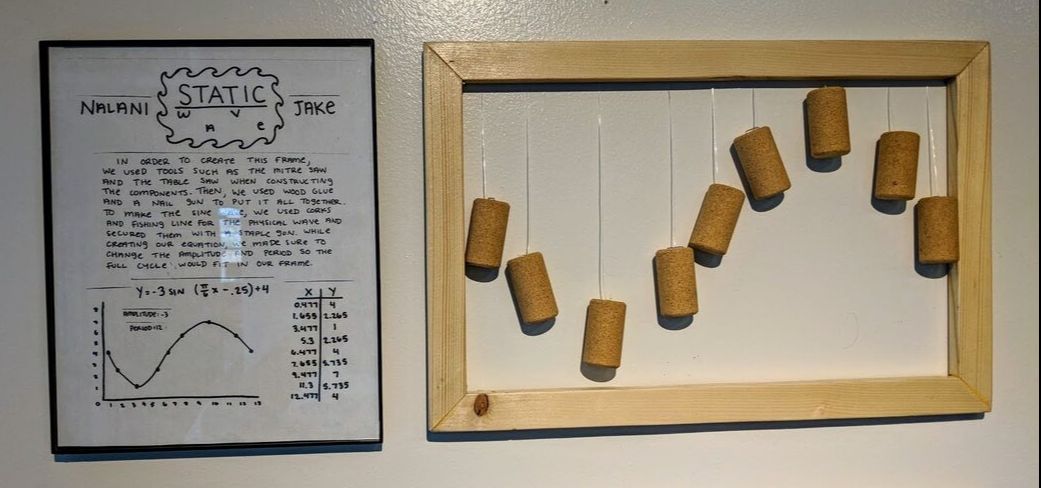
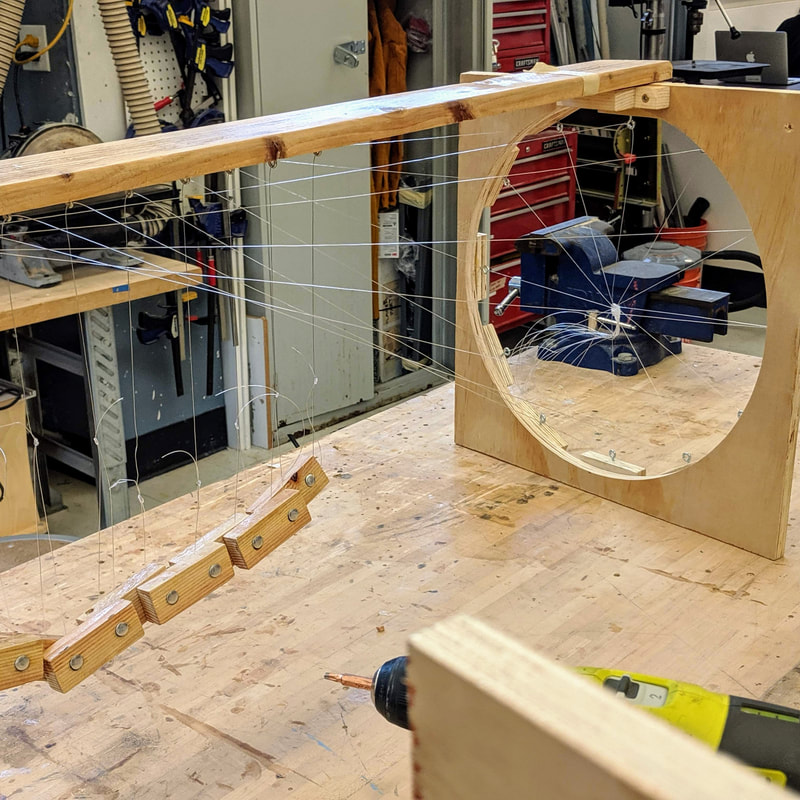
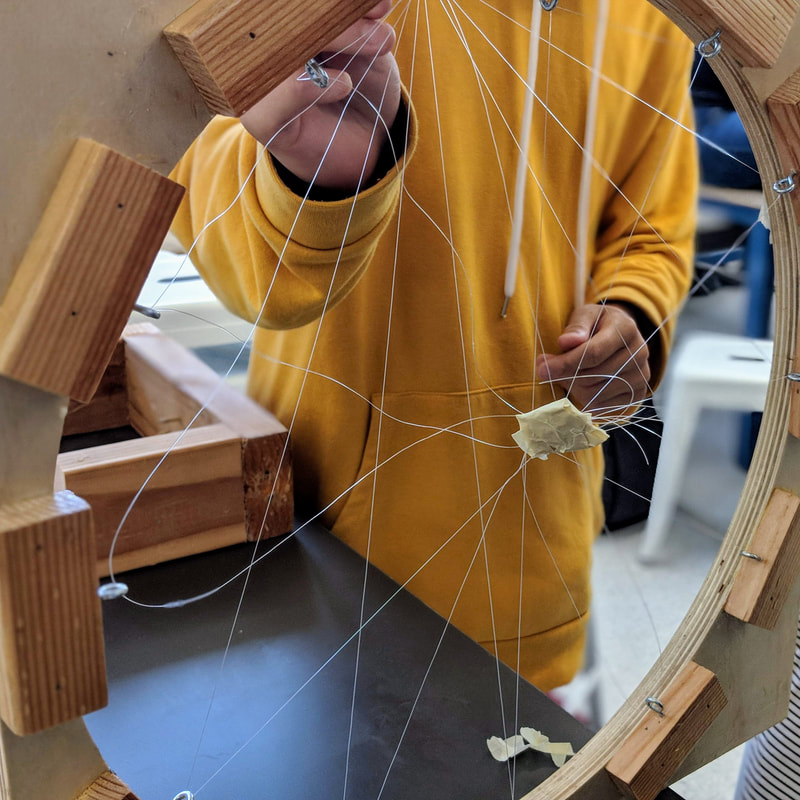
The first thing students did in the Lakeview project was build a wooden frame and suspend a mathematically accurate sine wave inside. Points on the sine wave were represented by corks. I could only design this initial deliverable because I had finished the project myself already. I knew that skills around string would be necessary as well as woodworking, not to mention knowledge and experience regarding mathematical and physical waves so I made sure that the first project required skills in each of these areas.
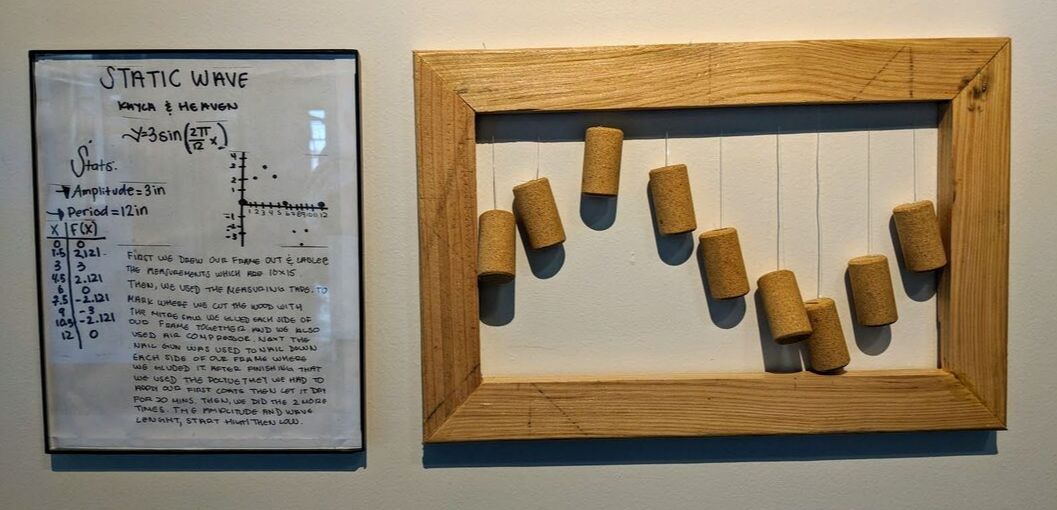
Students made a frame and defined a formula for a sine wave to fit that frame.
|

They had to be accurate in manipulating the variables of the frame and wave so that the physical product would match their graphs.
|
Critique and revision we utilized student to student and student to teacher to polish the page and frames.
|
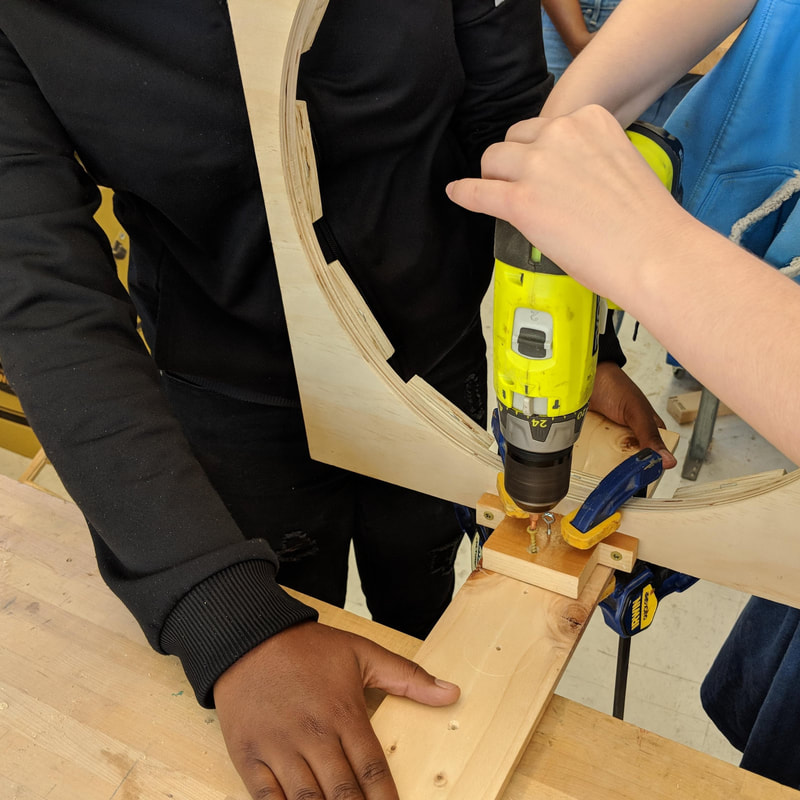
Step 1: Modeling
Students next assignment in this class was to copy my prototype wave machine. They drew detailed pictures and plans based on my model, and then cut out all the same parts and assembled it.
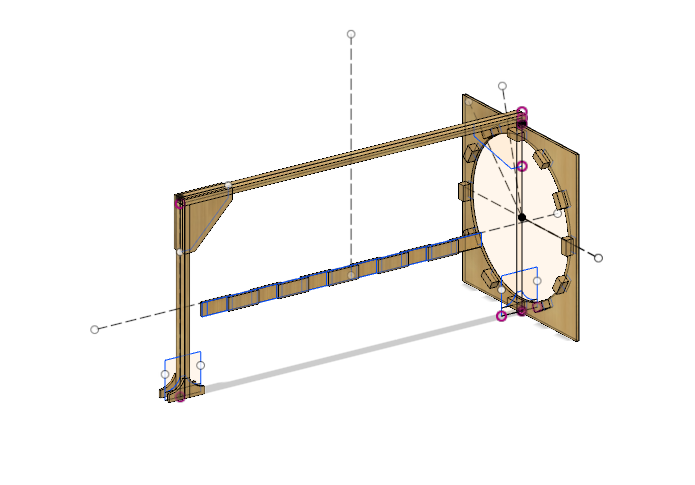
I made my drawing in CAD, but I think that learning this skill would slow down the overall process, so I had the students do this by hand.
|
|
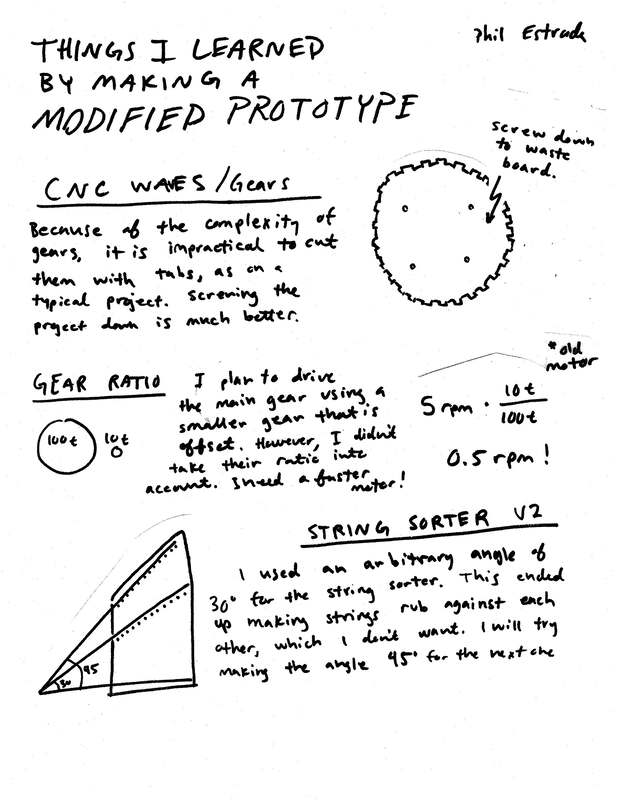
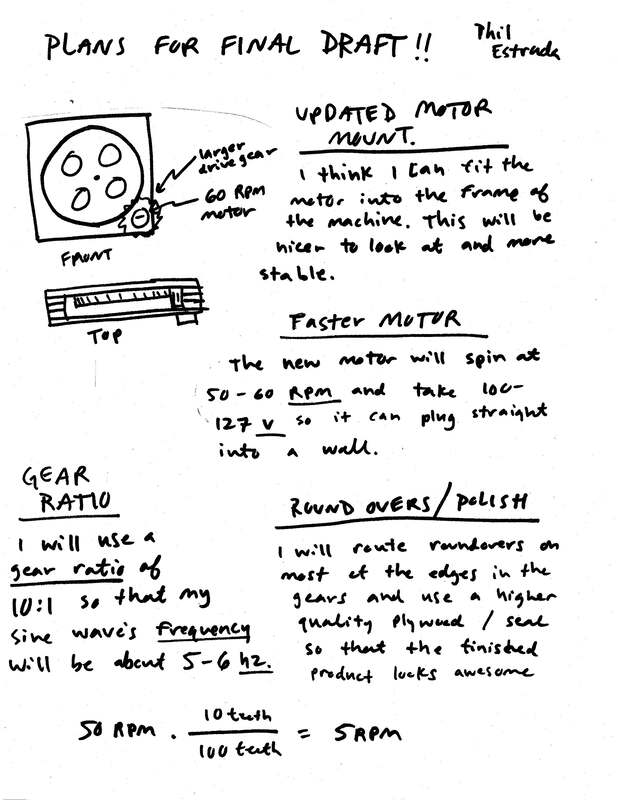
Step 2: Modify/Prototype
Everybody got a chance to modify their original model to make it more interesting to them. We used Richard Serra's verb list and Reuben Margolin's website as inspiration. Critiques were given on plans. These modified prototypes were not required to be beautiful, but just work. When planning this project, I had just connected my machine to a drill, and used that, but I provided students with motors for this phase so that the could learn to use them and make gear reductions.
|
I found that using graph paper is really nice for this stage of planning. Categorizing parts into handmade vs CNC parts was also useful.
|
|
Student CreativityI was initially worried that I had made the restrictions too tight for this project. I limited the amount of material that could be used and what motor speeds were available and a number of other things. Based on my past experience, I decided not to loosen up on my original constraints and see what the students came up with. Not surprisingly, they really impressed me with their ideas.
Using the verb list as inspiration, and after looking at Reuben Margolin's sculptured, students drew their prototypes in new shapes and configurations, then we ran a simple gallery walk to see them all. The variety and quality of ideas they produced was awesome. Simple constraints = Complex actions. |
|
Student Work Visible Here
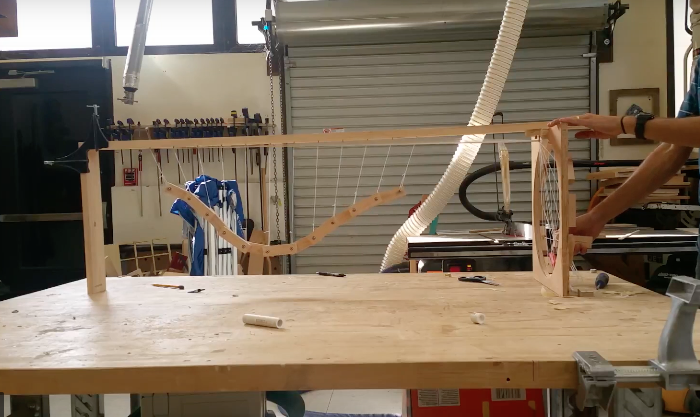
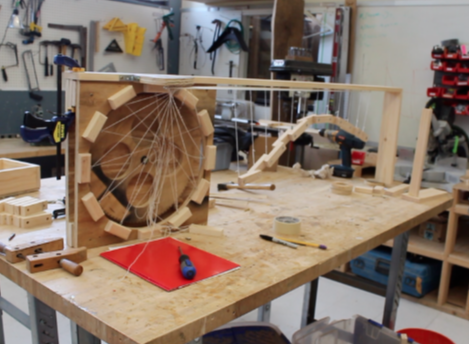
Step 3: Full Scale // Exhibition
For the final portion of the project, groups refined their designs through critique and revision. I provided credit as students met weekly checkpoints throughout the final build phase (all parts cut, 20 minute test, etc) to help everyone stay on track. I also required students to propose final credit for themselves based on evidence of their working habits and learning throughout the project.
The class will critique all plans and projects before material is distributed.
|
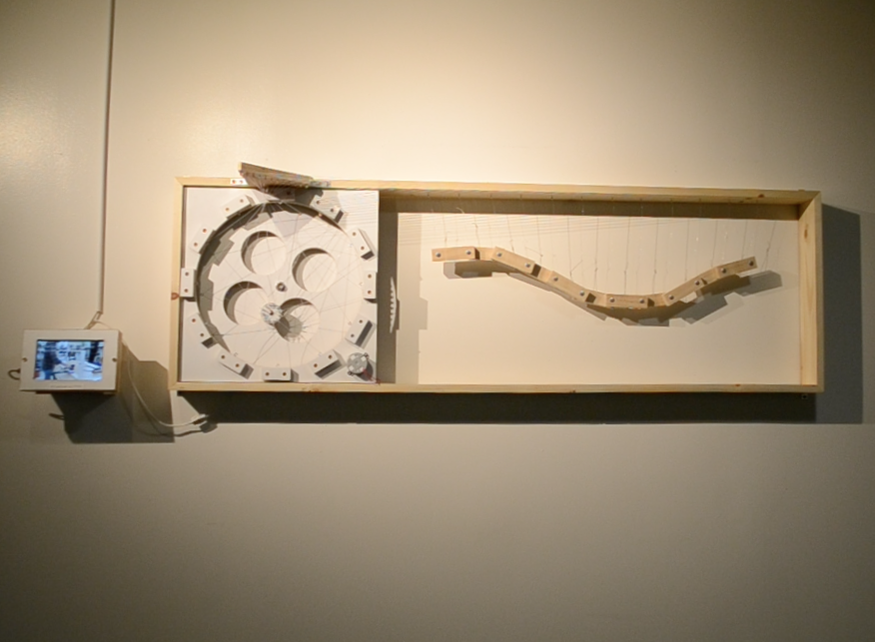
The final installation that I made included a video screen with a descriptive film that showed my process of building the machine. I removed this requirement because it really just slowed down my building process.
|
|
|
|
Rebellion Projects
At the tail end or final phase of all my projects, there are inevitably students who are losing interest in the process and product. We've been building in the shop for about 10 weeks by this time, so I understand. It isn't for everyone. Therefore, I like to plan ahead and offer some alternate projects (which I call rebellion projects) that are available for students and still contribute to the overall projects. This year there are 3 rebellion projects. Photo Essay, Exhibition Design, and Environmental Audit. You may read the description of each of these here.
What I learned about offering Rebellion Projects:
1. Show models: Obvious in hind sight, but what you model is what you get, so show students examples of the work you want them to make. If you haven't don't them yourself in the past, make your own examples
2. Take it seriously: I make students apply for these positions, including arguments and example work. This allows me to select students who I think will really benefit from the experience and not have it become the "easy option"
3. Provide calendars and structure: Students completing the rebellions will need as much structure as the rest of the class, so give them deadlines and opportunities to have their work critiqued.