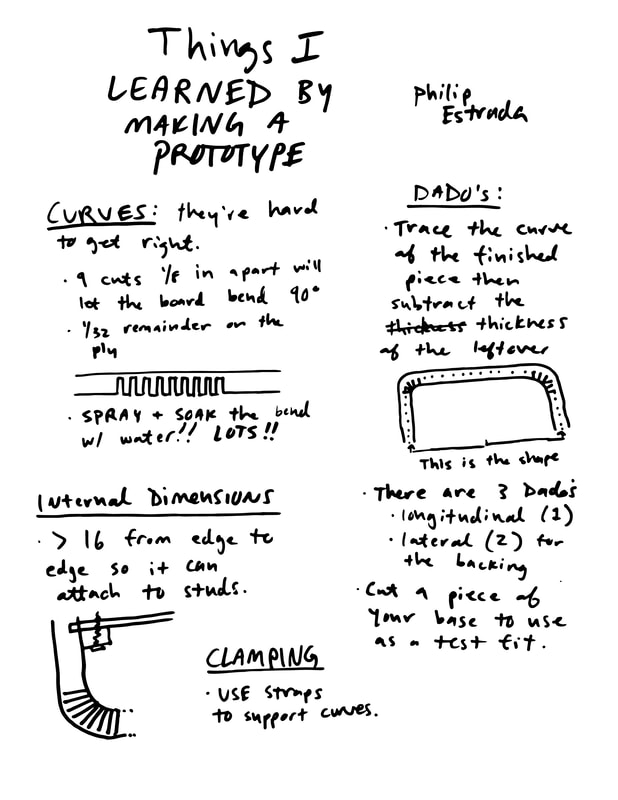
Note: I began planning this project but after playing with it decided not to use it. I've documented anyway because it's a good record of what it's like coming up with a project and why it's important to try it yourself first.
Project Description
What can we do to improve the school experience for future generations? Research indicates that the presence of plants and green growing things reduces stress and makes people more happy. Our species evolved to be most at home outdoors, surrounded by green things. All of the students at our high school spend the majority of their school day under a roof with fluorescent lights, with few plants around them. How might we increase the presence of green life in our schools?
In this project, students will design a solution for teachers and faculty to add plants to unused wall space in their rooms that is low maintenance and looks beautiful.
In this project, students will design a solution for teachers and faculty to add plants to unused wall space in their rooms that is low maintenance and looks beautiful.
|
|
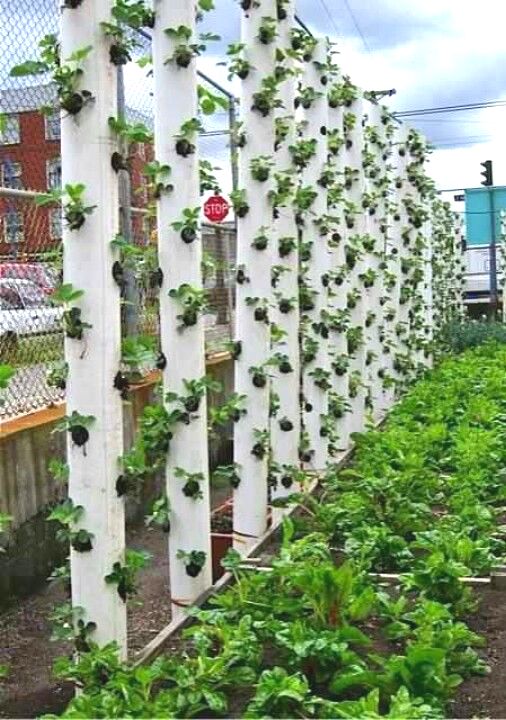
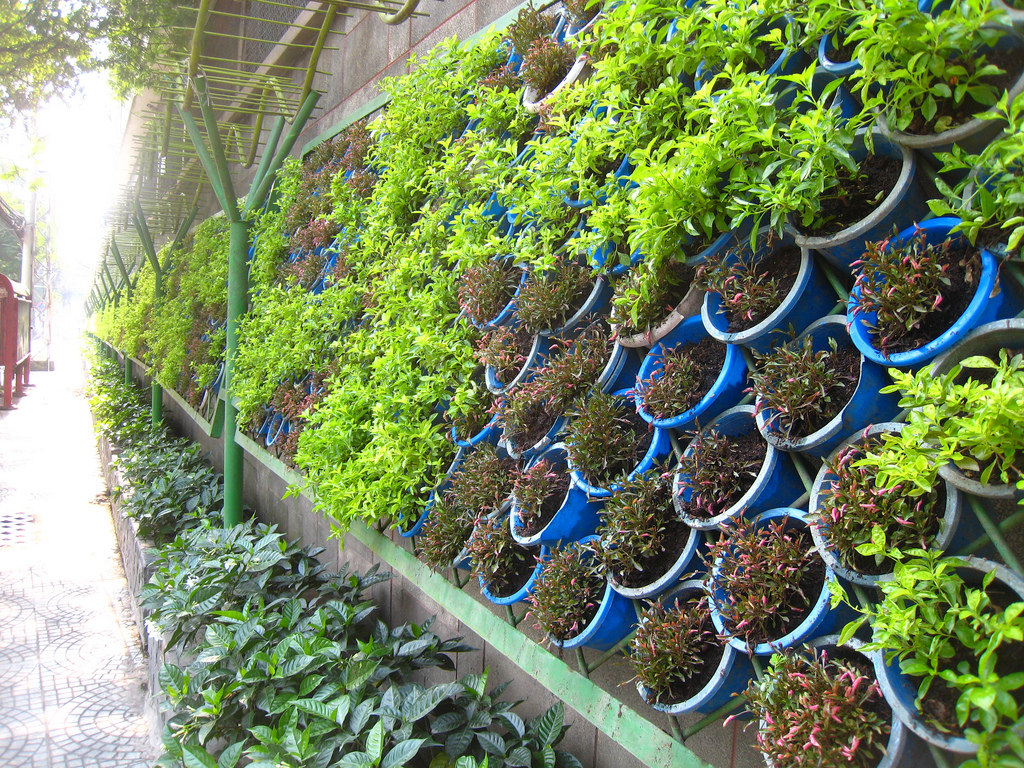
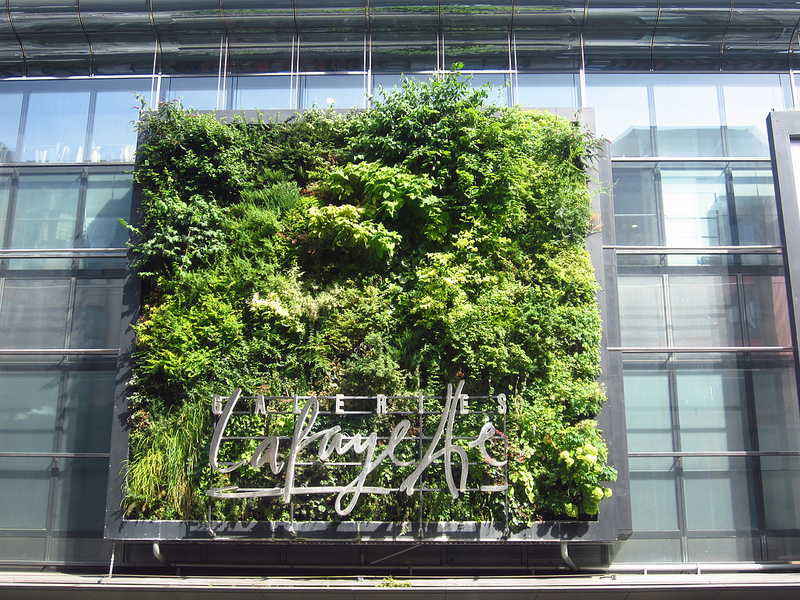
I'm inspired by these vertical planters. It makes me want to utilize blank wall around our school to add growing plants to our space. There seem to be a few main methods for making them, seen to the left.
1. Pipes: These PVC planters are nice because they are vertical, but don't hug walls as closely as I would like. Maybe they would be cool in the right context. 2. Individual pots: In this method, you just make a holder for all your pots so that they lean forward a little bit. Some even incorporate a reservoir for water. 3. Flat/compression wall: These have the plants grown from in between layers of substrate. They have a high density of plants and are very artistic. |
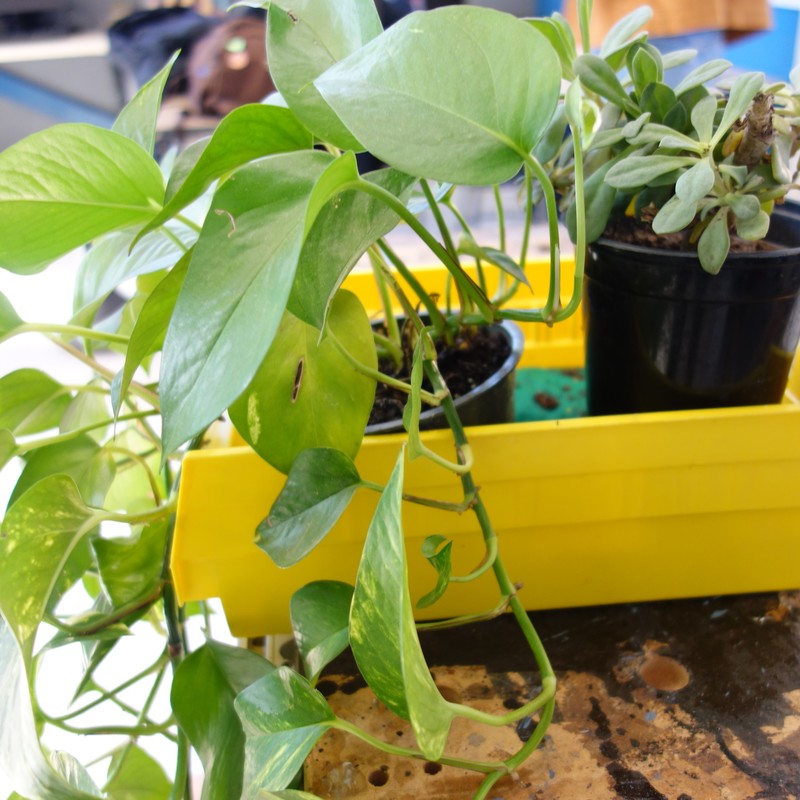
Step 1: Make a planter
Early tests
I knew that I didn't want to use the pipe method because I want my planter to mount on the wall, so I decided to build the other 2 styles.
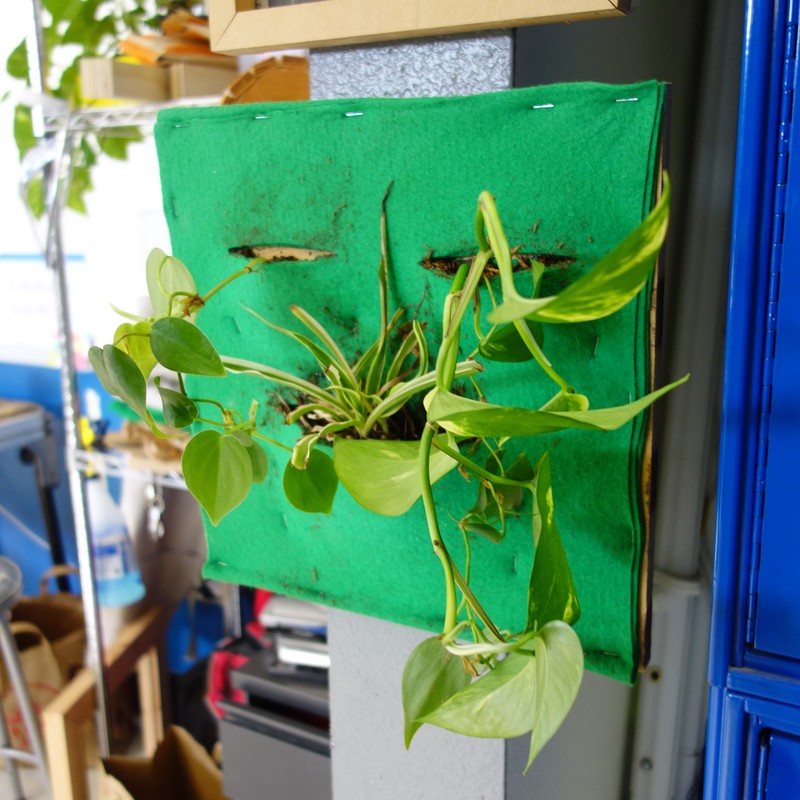
This is the first experiment with the flat method. It looks stupid, I know, but the plants are surviving and growing.
I tested this reservoir method in a plastic container to see if it works. The soil stays nice and moist for days and days.
|
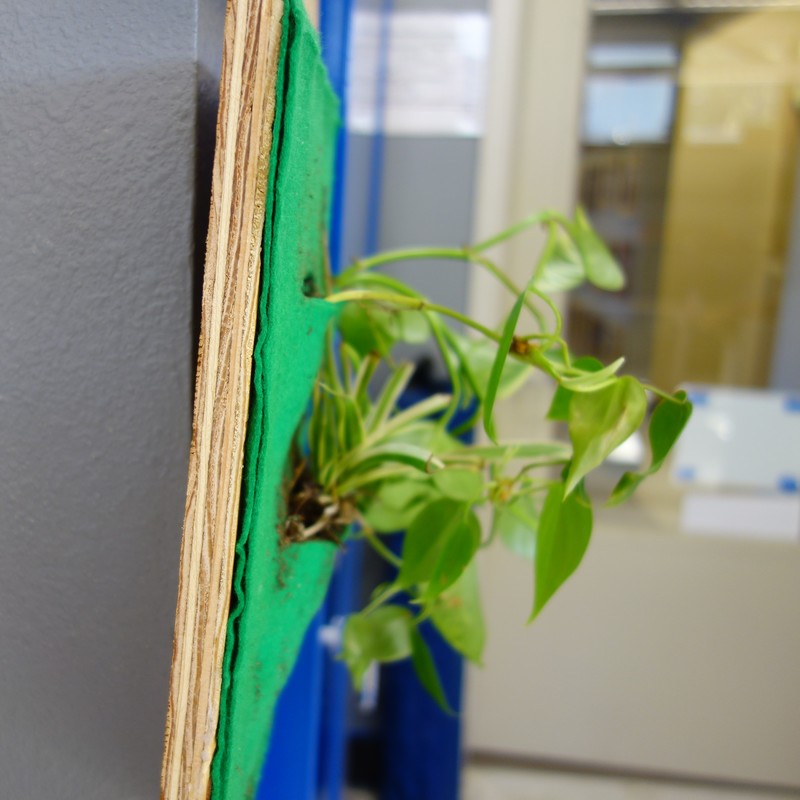
Very easy to make as long as the plywood is properly sealed. No word on how long this will last though.
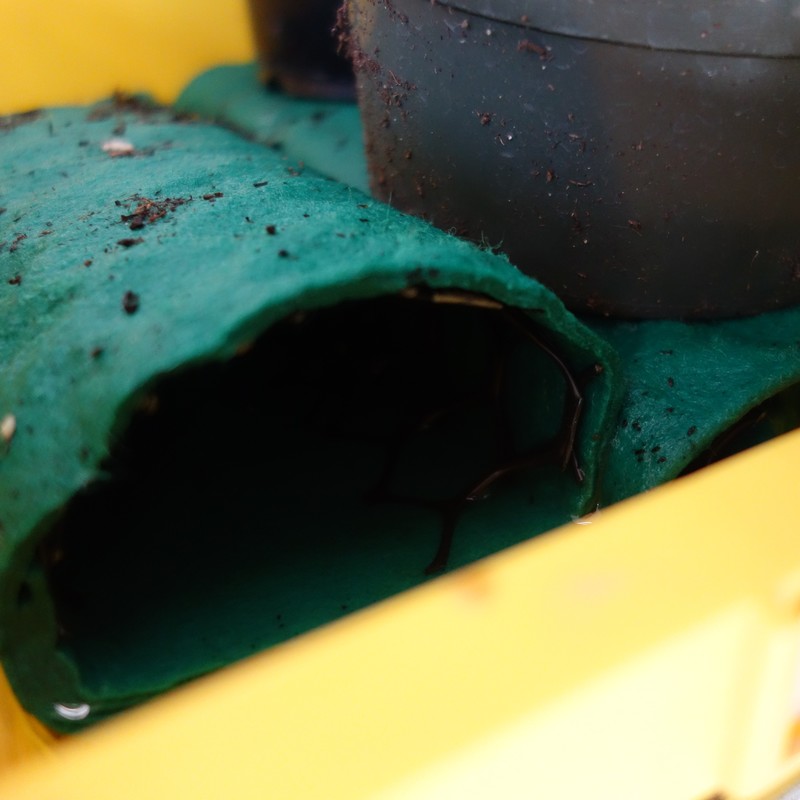
There is a plastic coil under there that keeps the plants out of the water, but the felt draws water up to the bottom of the pots, which have holes drilled in the bottom.
|
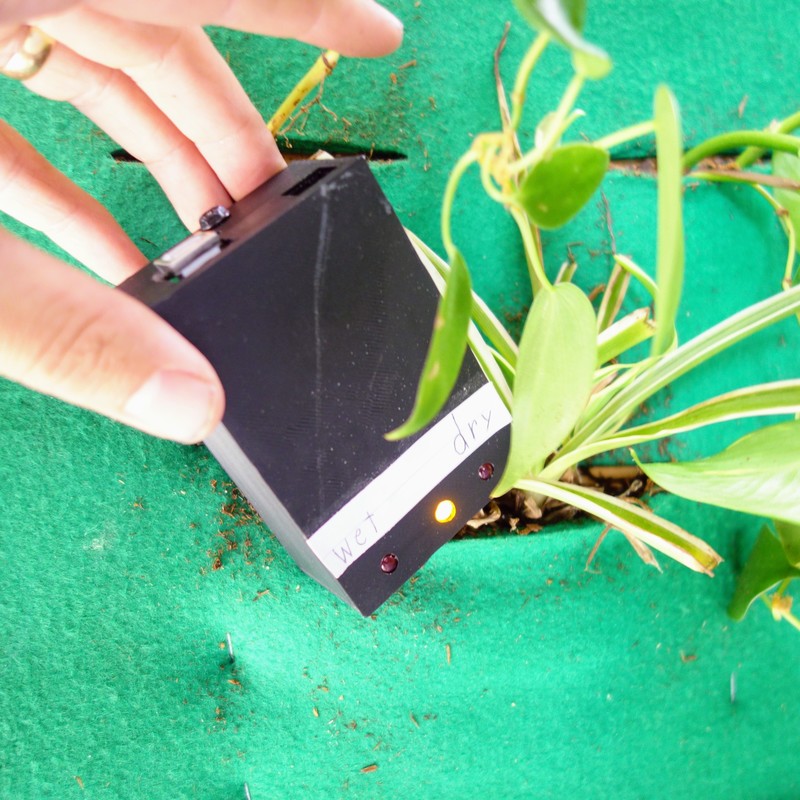
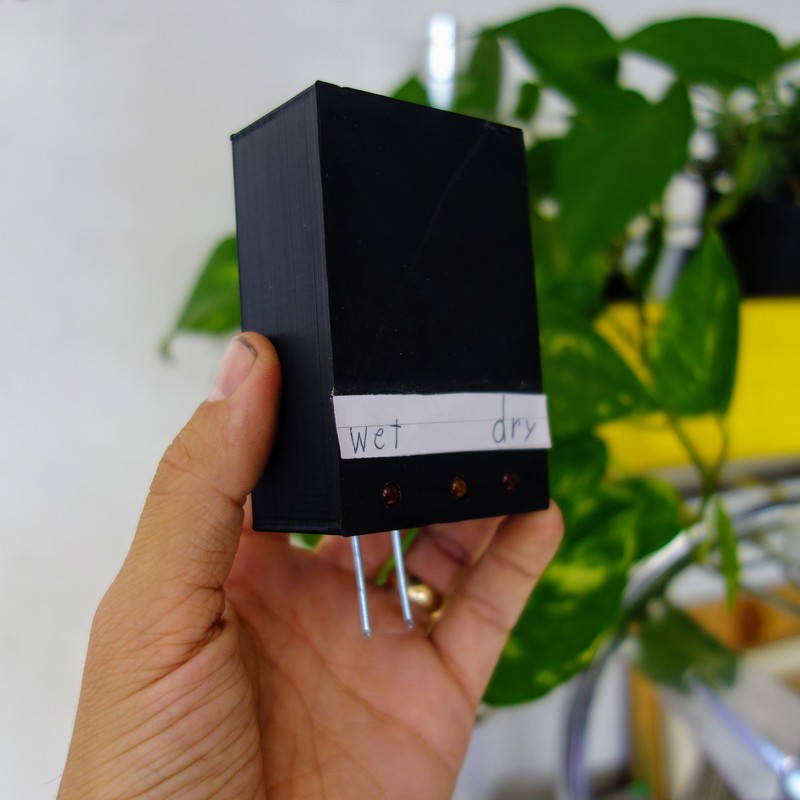
This has remained in the "ideal zone" after a week of spray-watering. This doesn't mean much though, as the sensor hasn't been calibrated.
The soil here is wetter than in the flat style planter. Even without calibration this sensor is showing the difference between the two.
|
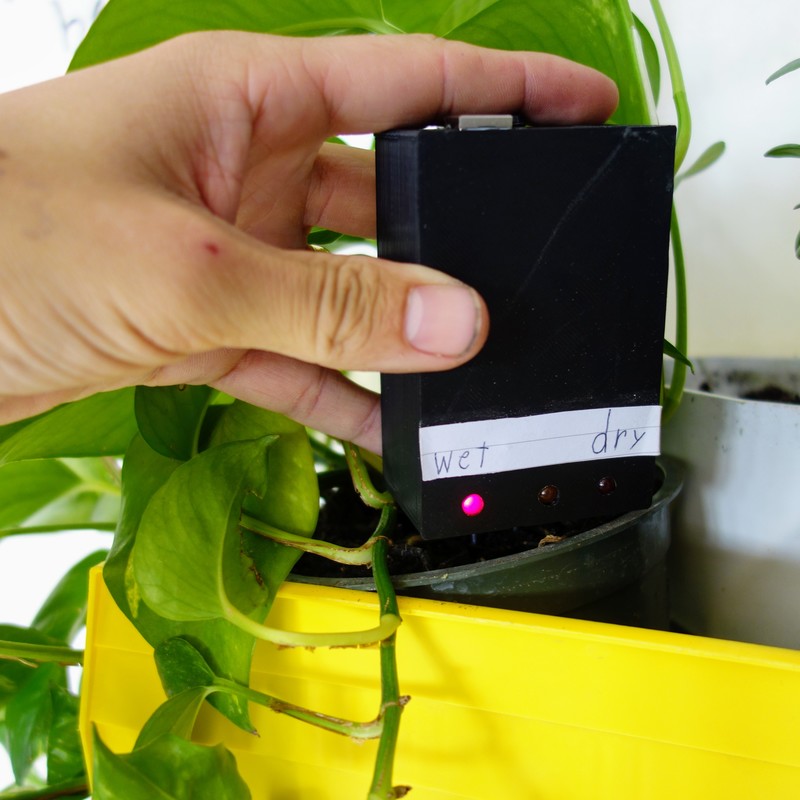
About that sensor..
|
A student made this for me when they saw what I was doing. I described the idea to them and they whipped this up using leftover robotics parts. I plan to reverse engineer the design so that I can show the class how to build them.
It runs on an Arduino and constantly measures the voltage between the two probes. When the probes are in a conductive (wet) environment, it registers a voltage and converts that to an integer which is used to trigger the lights. I need to calibrate the sensor to accurately display what ideal watering conditions are but this is a great start. |
|
Step 2: Build on the Design
|
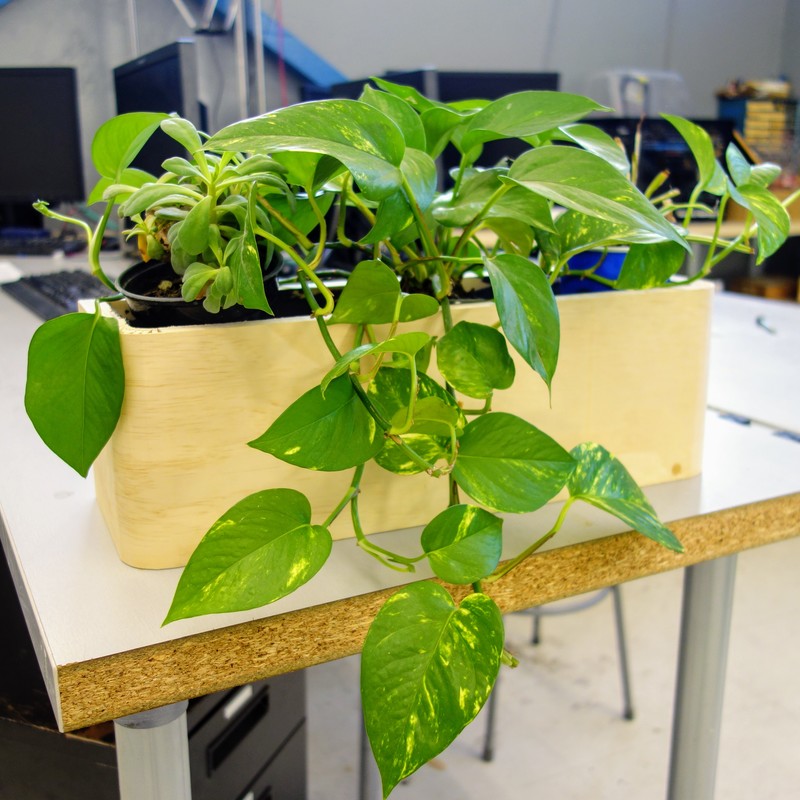
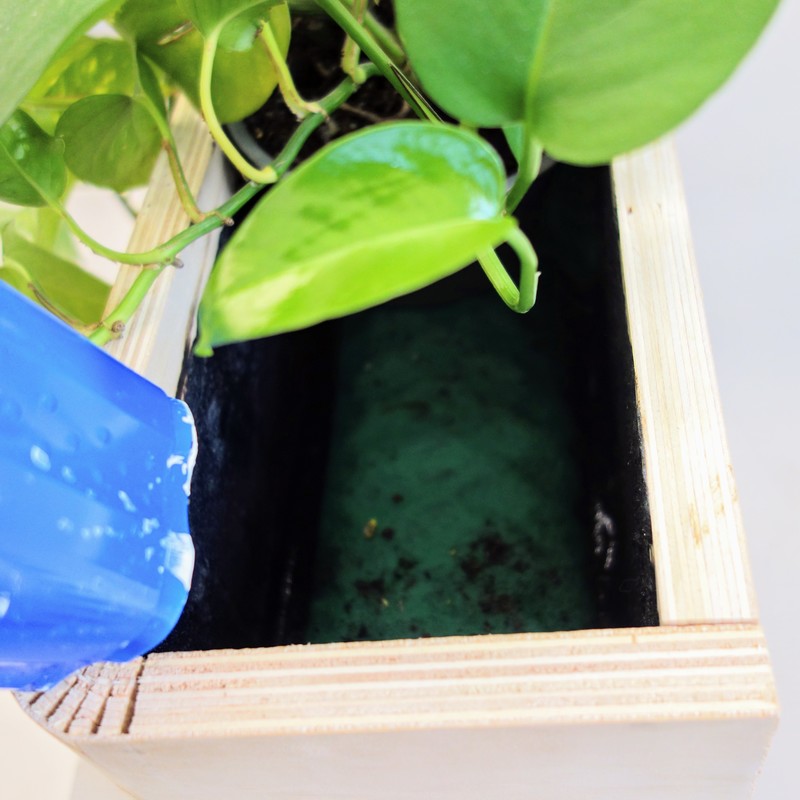
At right is my second version, which is based on the reservoir design from before. I lined the inside of this box with roofing cement to waterproof it. It has the same plastic and felt burrito inside and the reservoir holds a lot of water.
I like this idea and want to make another one with some changes. 1. I messed up the internal dimensions. I made the outside the size that the inside should have been. This box doesn't fit the pots I intended to use. 2. It's too tall, so I need to move the bottom up so that the pots sit in it just enough that the plants stick out. |
|
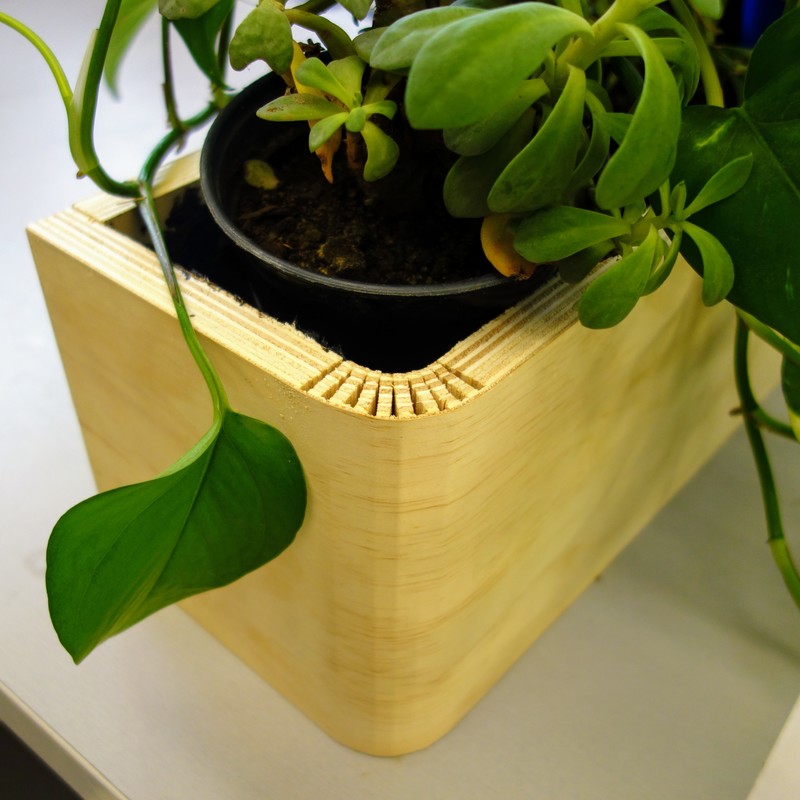
Curved edges just look cool and are interesting to me.
|
Detail of the felt burrito inside. This design works really well to reduce watering frequency.
|
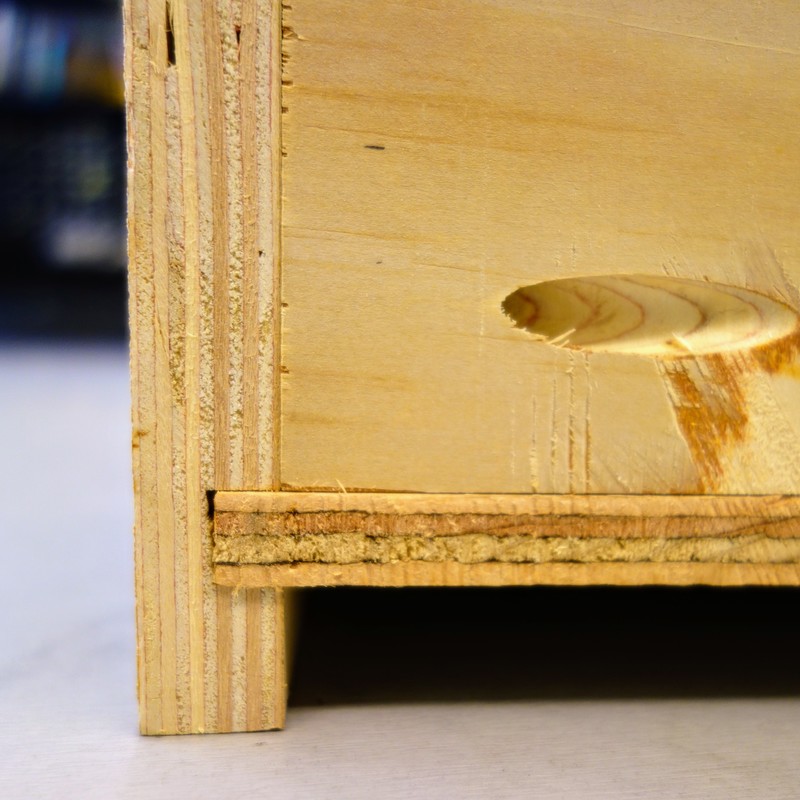
Dado joints between the bottom and sides so that there is plenty of support for the weight of the water.
|
|
Step Infinity: Keep Planning?
So I finished prototyping and felt that I was losing interest in this project. I was able to make my planter without really accessing Physics content and that felt discouraging. Projects typically work the best if finishing the work requires knowledge of the content. I think this is more of a carpentry project. If I was teaching biology or environmental science this would be great, but I decided to shelve the project for now.
Future developments:
- Require a mechanized component (follow the sun, auto feed, etc.)
- Start with a particularly challenging space in mind
- Utilize a novel construction technique (modularity, deployability,)
- Use a key material (aluminum, plastic..)
Future developments:
- Require a mechanized component (follow the sun, auto feed, etc.)
- Start with a particularly challenging space in mind
- Utilize a novel construction technique (modularity, deployability,)
- Use a key material (aluminum, plastic..)