-
Projects
- Talkin Trash
- Something New
- Nothing New
- Shift
- Ritual
- Colors and Shapes
- Tensegrity
- Lakeview Cut
- Second Nature
- It Gets Funkier
- Making Space
- Rotational Volumes
- Changed By Chairs
- Gearboxes
- Pendulums
- Microscopic Images
- Inspraytion
- 60 Word Short Stories
- PBL Illustrations
- Foundations Podcast
- Inclusive Strategies Podcast
- Helpful Links
- Blog
- About
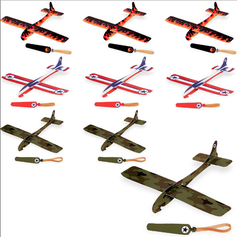
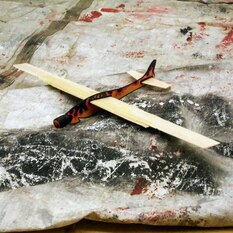
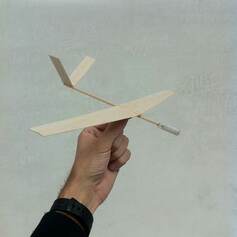
How do I scaffold complex tasks in an authentic and engaging way? or What is the day to day of PBL? Earlier in my teaching I used to think that in PBL we were intentionally withholding information. It felt like we were asking students to discover concepts and skills that were well established in academics and I didn't like the dynamic that it created. My perspective has changed since then and thought I'd share. So you are trying PBL, and you need your class to learn how to do something that is complex, like writing a comic book or building a glider. How do you scaffold all the skills that go into that task? How can you individualize the learning for each of your students? In short, you need to let them try it first, then fill in the holes over time. Here are my suggested steps for doing that. I'll give examples for a few different types of projects. 0.5 Do it yourself. First of all you should sit down with the materials and make whatever it is you are trying to make. Build the trebuchet, write the play, paint the portrait. At the least, you'll make sure that you have the appropriate supplies on hand in the right quantities, and you'll make a great example to show to the students. At the most, you'll learn how long everything takes, gain insight into the skills involved, and gain empathy for your students who will need to learn how to do this as well. Do it. 1. Everybody makes a model (day 1) On the first day of the project, give the whole class a pre-fabricated, fill in the blank version of the final product. Include instructions that are visual and concise. Show your final model and let them get to work. You're aiming to have the whole class assemble something functional, they are not being creative at this stage. Samples: 1. in Along for the Glide, I gave the class pre-made gliders and the instructions to assemble and then we went and flew them on the first day of class. 2. Essays: you could cut up the paragraphs of a well written essay and have the class arrange the paragraphs into something that makes sense. 3. Comic Books: consider cutting out a bunch of panels from a comic strip and have the class put them back together on the pages. 4. Portraits: Everybody completes a paint-by-numbers version of a famous portrait using the same colors. 2. Modify the Model (day 2) Once the class has assembled a model give them some cheap materials with which to make changes to their model. This is their first creative stab at learning this skill and is a lot of fun. Drawing inspiration from professional examples, they should modify their model in any way that they choose. You may set goals that they are trying to meet or not, but what is important is that everyone does something to change what they previously assembled. Measure the changes. Is it better now or worse? Why? Samples 1. In Along for the Glide, the class taped things onto the gliders they had assembled or cut shapes out. They looked at wind designs and added weights to their gliders. 2. Essays: Have the class re-order the paragraphs of their first essay by writing new transitions between them so that it still makes sense. They could re-phrase sentences that they find weak. 3. Comics: let them draw a few frames of their own or replace/modify some cells to change the story. Re-arrange where cells lie on the page for different emphasis or move text for clarity. 4. Portraits: Let the class pick a new color scheme and apply it to the paint by numbers portrait. They may sub divide units into more segments to make more definition in the image or combine them to make new shapes. 3. Scratch Build (day 3 - 4) Now that everyone has a workable model, it's time to start from scratch. Using their own model as an example, (or one from the class that they liked) students will make a version from scratch using the correct materials and techniques. They may improvise some parts but encourage them to try and replicate what they created previously. (In Along for the Glide, students tried to beat the glide ratio of their models). These builds are subject to critique and will be assessed for specific goals that are outlined by the teacher. I've been using a One Point Rubric for this lately and it's pretty quick to put together so that everyone gets critique and knows if they have met the goals. Once this part of the process is done, I usually have the class complete an assignment where they summarize what they have learned about the process we are practicing. Taking the time to create their own set of guidelines for the work is valuable and lets them highlight what they find important to remember. Samples: 1. In Along for the Glide, the class tried to replicate their glider (or someone else's) by building it from scratch out of foam and balsa wood, using the dimensions of the previous model. 2. Essays: identify the parts of the essay and it's structure. Write your own using the same structure, sentence for sentence or paragraph by paragraph. 3. Comics: Identify the purpose of each panel or paragraph. Make a new version of the same story where each panel serves the same purpose. Use new characters or settings. 4. Portraits: Pick a model that you like. Re paint it from scratch without the paint by numbers format. 4. Planning and Build (day 5 - 7) The next stage is to plan out a more detailed version of their project. Do not let the students start working on their actual product until their plans have been critiqued and approved. It is important to critique their plans at this stage because they are prototyping their final version of their project and the more detailed their plans are, the better their final project will be. Provide them with examples of what professional plans of this type of project look like. Once they have had their plans approved, they may begin working. Partnerships work well for this if the project is appropriate. Samples: 1. In Along for the Glide the class planned out their next glider with a partner, pulling from what was successful in previous versions. I also provided them with professional plans to use or draw from. 2. Essays: Students must create an outline for their essay with potential sources noted. 3. Comics: Everyone creates a storyboard outline of their comic. Major beats of the story are outlined and source images are presented to give an idea of the art style that will be used. 4. Portraits: Students find a source image and trace around the different colors that they see, making a paint by numbers style plan of what they will paint. They also should provide a color scheme for the portrait, if they are doing true to life colors or if they are changing the colors. 5. Assess and Succeed (day 8 - 10?) This might be the last step for you. It usually is for me. This is where the class makes the final version of the project that they've been developing. Critique and assess the work from the previous step, which should be pretty final in nature, but still needing work. Make a rubric for this by yourself or with the students. Once they've had their work critiqued they will either need to A.) update their plans and start another draft of the product, B.) modify their existing draft to make it better Either way, this is the final leg of the process. Set clear goals for what everyone should be finished with by the end of a work session and let them go for it. Samples: 1. For Along for the Glide everyone was required to start a new draft. We treated their initial gliders as prototypes, they were functional learning models. Once they had measured the performance of their design they either updated it to improve or picked a new one. 2. Essays: Writers circles can be employed for deep critique of the works. Perhaps each day of the work time could focus on improving various aspects of the work, (structure, flow, style, etc.) to keep things moving. 3. Comics: Up to this point the cells will probably have been sketches. Now each is rendered as beautifully as possible and lettering is done professionally. Critique often, focusing on specific aspects of the whole (Art style, organization, story, lettering) 4. Portraits: Up to this point I think that the class could have been painting small scale portraits. For the final, scale everything up by 2x and add a bit more detail to the work. Notes: This style of long term scaffolding is great when paired with relevant lessons. After the class has modified their initial models, you can do Critique as a Lesson, or field questions from the class to guide your lessons. What makes this great is that every student has a context for the information and will need to learn the material in order to complete the task.
DO NOT ASSESS THEIR WORK UNTIL THE END!! If students feel that they are trying to get a certain grade in the early stages of the process, they will not experiment and will not feel safe to fail. Let them try something that they think is interesting and give critique. Give completion credit if you must, but make sure that they know they can try anything. Once they sit down and plan their final version they will be working to make something of high quality, which you could grade, but in the beginning DON'T GRADE IT.
0 Comments
Leave a Reply. |
AuthorPhilip Estrada is a teacher at High Tech High Media Arts in San Diego California. He teaches Physics by having kids build things in a woodshop. Archives
May 2022
Categories
All
|
Proudly powered by Weebly


 RSS Feed